
I get a lot of emails from other photographers asking me questions and I definitely want to get back to everyone but I've decided to start posting my replies on the blog so that everyone can benefit. So here's my first "Frequently Asked Questions" (FAQ) reply :).
The questions is: "Your images still astound me as to the quality sharpness and overall exposure. Please let me know your secret."
This one made me laugh a little. There's really no "secret." I'm flattered but it's not like I've found this one magical thing that makes good photos. But I'll try to share a little bit of my approach as it involves exposure and sharpness.
Exposure. #1 Know how your camera works. I shoot all manual. I leave the aperture wide open and modify my shutter speed as needed--never going below 1/80 when hand-held. I change my ISO when I change lighting situations as needed. Many photographers I've seen err on the side of under-exposing. I used to struggle with this myself. We meter through our camera and expose for the brightest part of the image. The problem is that rarely is the subject the brightest part of the image. We end up exposing for lights in the background or something that isn't important to the image. So I keep that in mind when I'm shooting and "over-expose" images (according to the meter) when there is any type of back-lighting or bright spots in the image that are not the subject. It's important to get the exposure near perfect in camera. But I also shoot RAW so that allows me to make adjustments afterwards. Don't be afraid to use Photoshop to bump up the exposure as well.
Sharpness. I use back-button focus (see this post) and keep my focus point in the center. I also use the "smart sharpen" filter in Photoshop on the images I blog.
That's the whole "secret" :).
Ok--so I'll give you a few before and after images and explain what I did to them in Photoshop to achieve the final image.
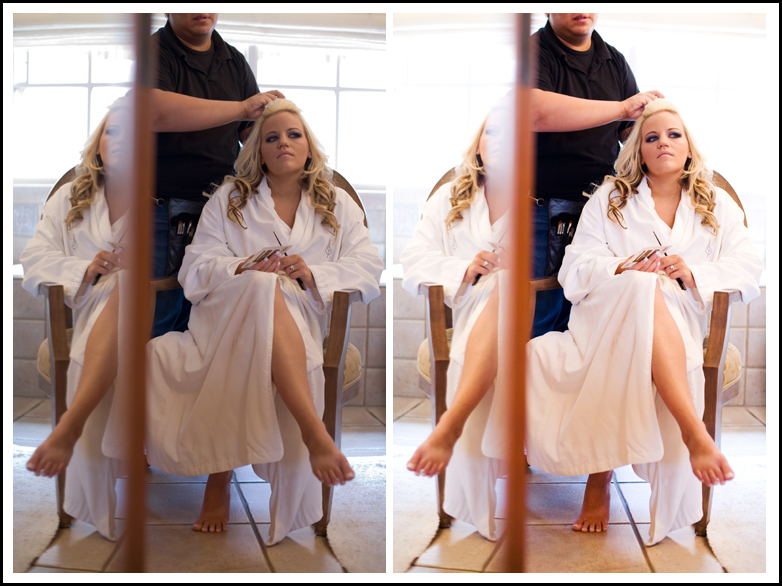
As you can see in the above image, I shot it ok. Could have bumped up the exposure even more to blow out the background more. In Camera RAW I bumped up the exposure and contrast. Then I opened the .jpg in PS and ran a Kevin Kubota action I customized. It's his X-Process Combo. I think it's REALLY strong as it comes so I dilute the opacity of the action layers down to around 20%. I built it into the action so that it does it the way I like every time. Then I smart sharpened and that was it!
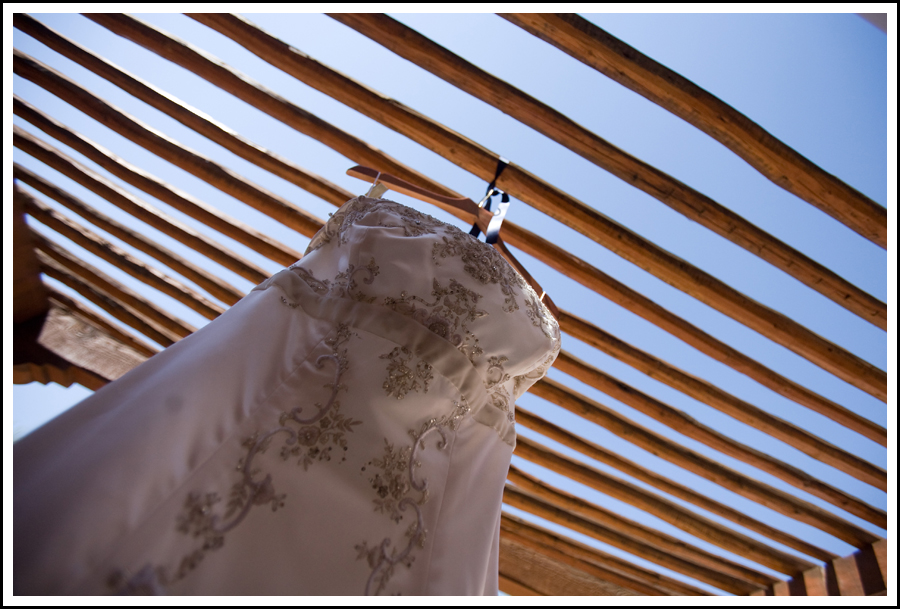
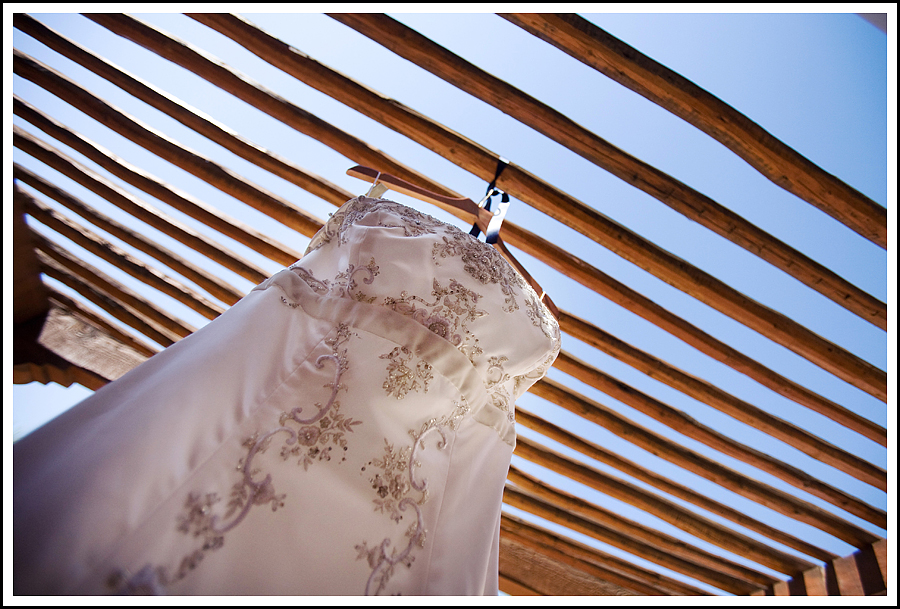
On this image I exposed it for the blue sky so the dress is a little under-exposed as you can see above. In Camera RAW I just left it alone and converted it to a .jpg. Then I used Kevin Kubota's "Digital Fill Flash" action at around 20% to lighten up just the dress. I love this action. It functions kind of like the dodge tool in PS but in a much more subtle and realistic way. Then I ran my X-Process combo and sharpened. That's what gave me this:
So those are a couple of my favorite, oft-used actions that I love. There's so many action options out there and they are good when used to enhance the image. But I'm a big believer in not over-using them. I see many photographers whose images look way too processed to the point where that's the first thing you notice about the image. I'm not a fan of that.
Hope that answers the question! That's all the "secrets" I have :).
Hope that answers the question! That's all the "secrets" I have :).
Comments


