
Today I'm wrapping up my series for photographers on shooting wedding reception details. If you haven't done so already, click below to get caught up!
Part 1: Pick the right detail
Part 2: Light
Part 3: Positioning
Part 4: Picking a Focal Point
So far in this series we've talked about all of the important variables that go into shooting wedding reception details beautifully. In this final post, I want to share a few more final tips that will impact your ultimate success in this endeavor. There are some additional key things you can do to set yourself up for success -- and most of them are done long before the wedding day.
One of the most important keys to success surrounds having a well thought out timeline that offers you quality alone time with the details. There is a lot to think about when photographing details, as evidenced by the first four posts in this series, so you will need sufficient time (typically 15-30 minutes, depending on the quantity of details, and how quickly you work) if you are going to come up with stunning reception detail imagery.
Each wedding is different, but there are usually multiple people that are involved in finalizing a timeline -- the bride, the photographer, the wedding planner, and the catering/venue manager -- to name the usual suspects. Because every wedding is unique, the timeline for each wedding is kind of like a puzzle that needs to be solved. There are a lot of competing interests for all parties involved. For instance, the bride and groom don't want to see each other before the ceremony, the bride and groom want a sunset ceremony, the reception venue is at a different location than the ceremony but the portraits need to take place at one or the other spot, the planner needs to make sure there is a good flow for the guests, and the catering manager is interested in the food being served warm. And guess what one of the interests of the pesky photographer is? Having time to shoot the reception detail photos in the midst of all the craziness. The great thing is that this interest is also typically shared by the bride and the wedding planner who would love images of their beautiful work come-to-life, so this generally is not a hard fought battle.
Not every wedding has an independent wedding planner, but if it does, the planner is your ally and the first place to start when thinking through timeline issues. It's your job as the photographer to communicate your needs and educate other parties on what is involved and how much time you need to accomplish the goal. Planners are great because they are the ultimate timeline puzzle-solver. If there is no planner, then this job typically falls to the photographer and the bride to negotiate.
Now, I can't give you every timeline scenario, but here are a few common ones, and how I would deal with them:
-If I am shooting all the portraits before the ceremony (this is ideal, and I go into more details as to why in my "Ideal Wedding Day Timeline" post), then I have my 2nd shooter cover cocktail hour after the ceremony while I shoot reception details and get set-up for the reception.
-If the bride & groom aren't seeing each other until after the ceremony, and I need to do all of the portraits then, this presents more of a challenge. There are a number of acceptable solutions that work. First -- have an extended cocktail hour or break between the ceremony and reception so you can shoot all of the portraits and the reception details. Second -- shoot the bride & groom portraits and then have your very capable 2nd shooter photograph the bridal party and family portraits while you shoot reception details. Third -- if your 2nd shooter is great at shooting details, you can have them cover the reception details while you do the portraits. This option is my last resort because I'm selfish and love shooting reception details. I also have a hard time letting go and trusting someone in this realm. Fourth -- for large weddings with a very tight timeline and a lot of bases to cover, ask the client to pay extra so you can hire a 3rd shooter for one or two hours. Then the three of you can cover portraits, cocktail hour and reception details, according to your strengths. Fifth -- if the reception space can be completely set-up before the ceremony, you could find some time before then to photograph details.
-If the reception is at a separate location, I sometimes ask if my 2nd shooter can catch a ride with a planner or some bridesmaids and I will leave my 2nd shooter to photograph family portraits at the ceremony venue while I dart over and shoot reception details right away and then meet up with the bride and groom (and possibly the bridal party) at the reception venue to shoot their portraits during cocktail hour.
I hope these examples give you an idea of the possibilities. Ever wedding timeline presents a different set of interests and challenges, so each one needs to be approached individually, but the important thing is to speak up for your interests as a photographer early on in the process -- and not as a bully, but as an expert who knows what it takes to get the job done well.
One final timeline consideration surrounds outdoor receptions. When it comes to photographing reception details outdoors, it's not just a matter of finding the time somewhere, somehow, but of finding the optimum time. If at all possible, you want to have plenty of natural light, but photograph the details when the sun is as low in the sky as possible, or just after it sets. That way your light source is soft and even, and your scene setting shots will be spectacular. The photos below were taken at just the right time, right after the sun had set over the mountain in the distance. The planner asked that I take some detail shots before the ceremony, which I did, but I ended up re-taking the same shots after the ceremony and not using the earlier ones, because these were so much better. For the earlier photos, I was dealing with harsh sun and shadows. But these were just perfect:
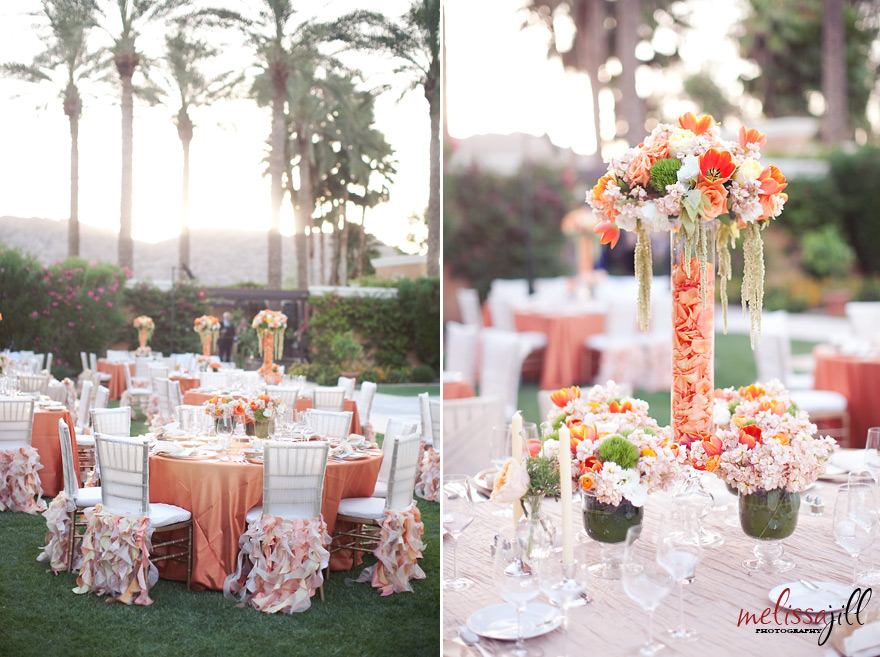
And for this next outdoor reception, I actually waited a little bit to start shooting reception details, so that the lighting would improve, and then sprinted to capture all that I could in the ideal light. It paid off:
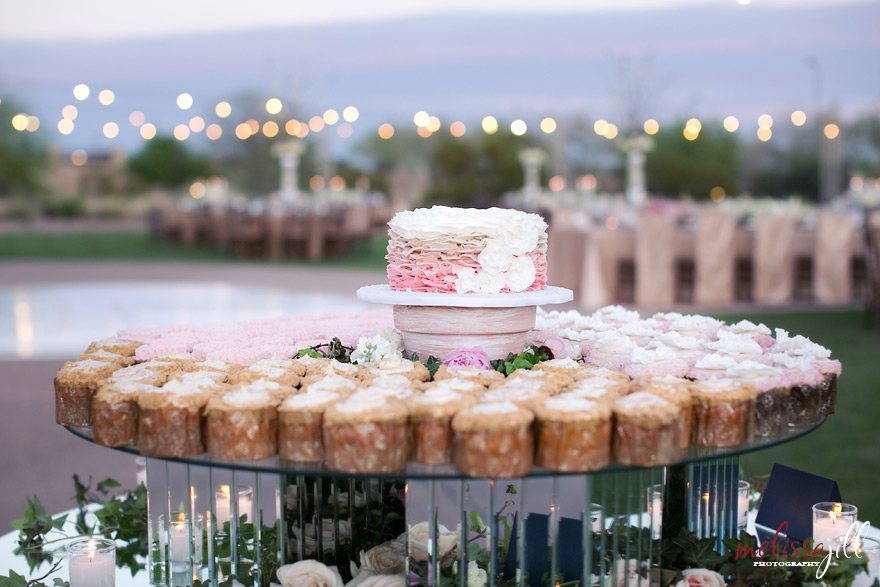
For both of the above weddings, planners were involved in making the timeline perfect, and they automatically made the reception start just after sunset, so it worked out ideally for me. But when you know you are going to be shooting an outdoor reception, it would pay off to talk with a planner or the bride early on in the process to see if you can set up the whole structure optimally and shoot in this type of light.
My next tip for setting yourself up for success is to ask the planner or bride for a list of details they want to make sure are photographed. Most weddings are pretty straight-forward, and you know what needs to be shot, but some weddings have sentimental touches or massive amounts of details, and it can be easy to overlook or miss something in the rush of the day. When I get a list like this from a planner, I look it over and highlight the details that are unique -- those that are not typical details that I shoot automatically. I make sure I know which part of the day and in which location each is found. And then I hand it over to my assistant so she can manage the completion of it on the wedding day. She checks off items as she sees me photograph them, then checks in with me asking if I've photographed a detail on the list, or reminding me to photograph something here or there. Occasionally I've had to ask planners where something on the list is, and in the process, realized there is a whole other section of the venue that I was unaware of. Thank goodness for the list or I may have missed it!
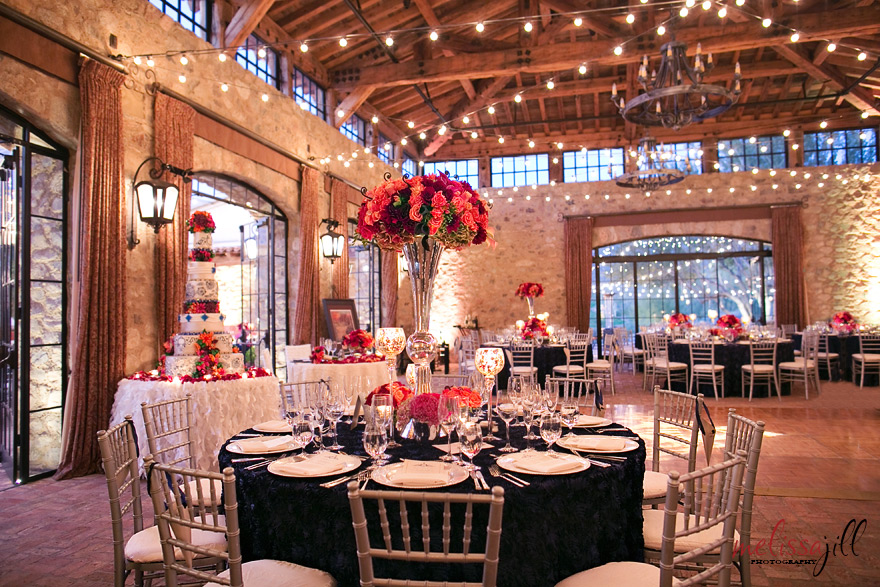
My next tip is to pack a tripod. I don't use one at every wedding reception. But occasionally, when there is time, I will pull it out to photograph a room shot like the two images below. Sometimes you can get these kinds of shots hand-held, but you never know what the venue will look like until you arrive. Sometimes there is enough light, and other times, you will want to use flash. Unfortunately, flash typically does not work well with room shots, because it will not light up the whole room. And you don't want to just flash one table. That will look artificial and ugly. With a tripod, you can slow down your shutter, keep your ISO lower, and really capture the ambience of the room:
My next tip for setting yourself up for success is to ask the planner or bride for a list of details they want to make sure are photographed. Most weddings are pretty straight-forward, and you know what needs to be shot, but some weddings have sentimental touches or massive amounts of details, and it can be easy to overlook or miss something in the rush of the day. When I get a list like this from a planner, I look it over and highlight the details that are unique -- those that are not typical details that I shoot automatically. I make sure I know which part of the day and in which location each is found. And then I hand it over to my assistant so she can manage the completion of it on the wedding day. She checks off items as she sees me photograph them, then checks in with me asking if I've photographed a detail on the list, or reminding me to photograph something here or there. Occasionally I've had to ask planners where something on the list is, and in the process, realized there is a whole other section of the venue that I was unaware of. Thank goodness for the list or I may have missed it!
My next tip is to pack a tripod. I don't use one at every wedding reception. But occasionally, when there is time, I will pull it out to photograph a room shot like the two images below. Sometimes you can get these kinds of shots hand-held, but you never know what the venue will look like until you arrive. Sometimes there is enough light, and other times, you will want to use flash. Unfortunately, flash typically does not work well with room shots, because it will not light up the whole room. And you don't want to just flash one table. That will look artificial and ugly. With a tripod, you can slow down your shutter, keep your ISO lower, and really capture the ambience of the room:

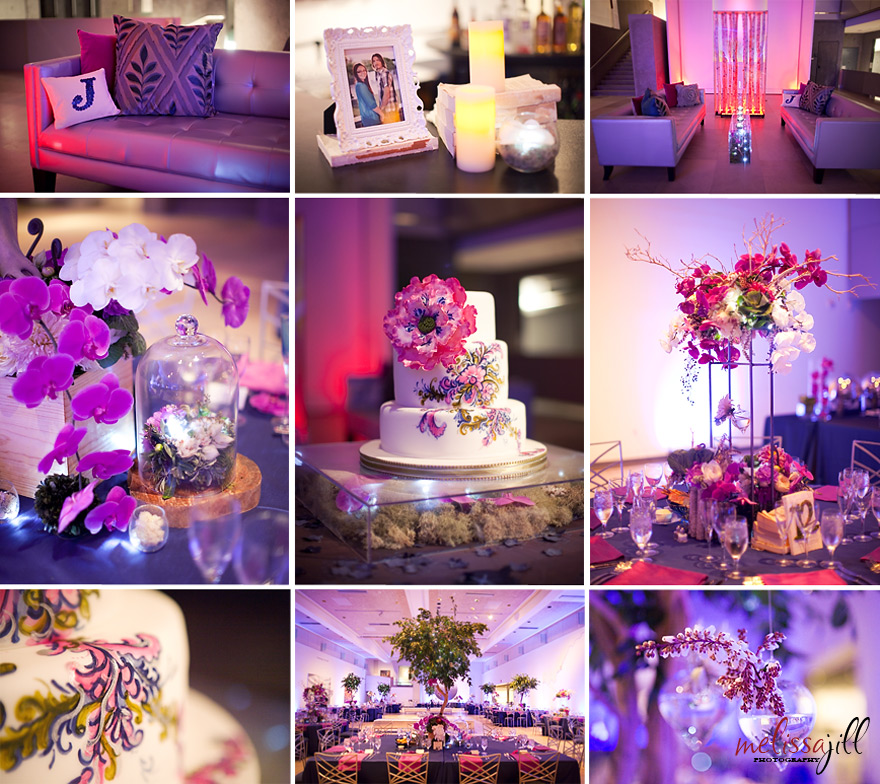
My FINAL tip is to shoot as much as you can during the time you have allotted, and to take a huge variety of images. When I approach a specific detail, like the amazing escort table pictured below, I like to start wide and then get closer, shooting tight shots of some of the more intricate details:
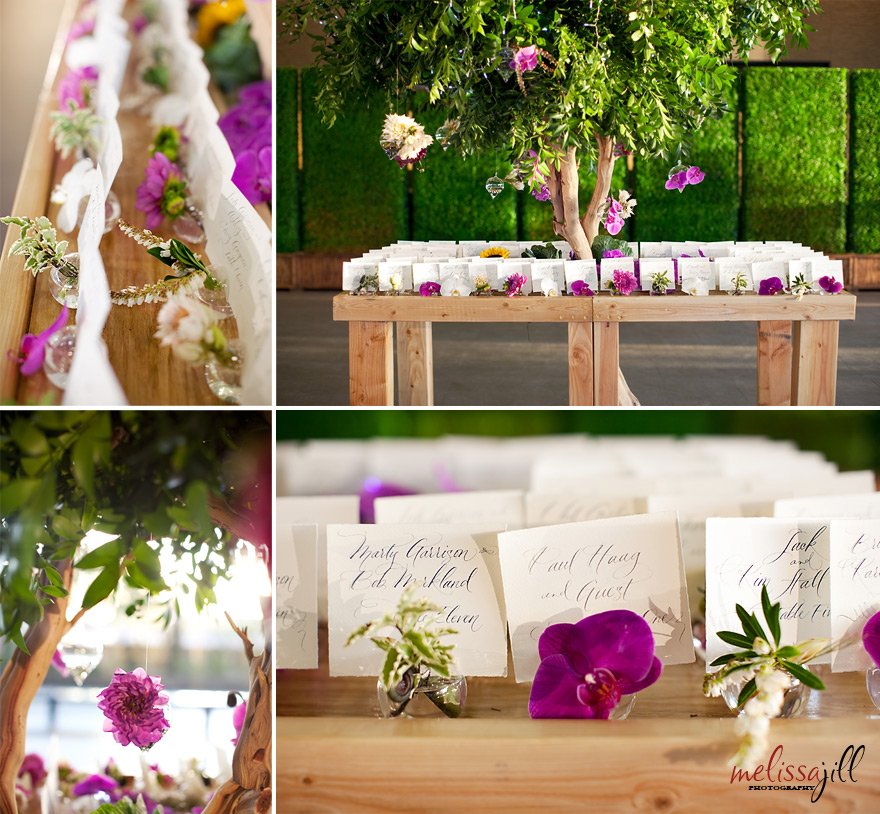
Also, make sure you pay attention to variety among specific details. Sometimes more than one centerpiece is used -- like in the collage of details at the top of this post -- or table numbers vary from table to table. You don't need to shoot EVERY table number, but you need to shoot one of each type:
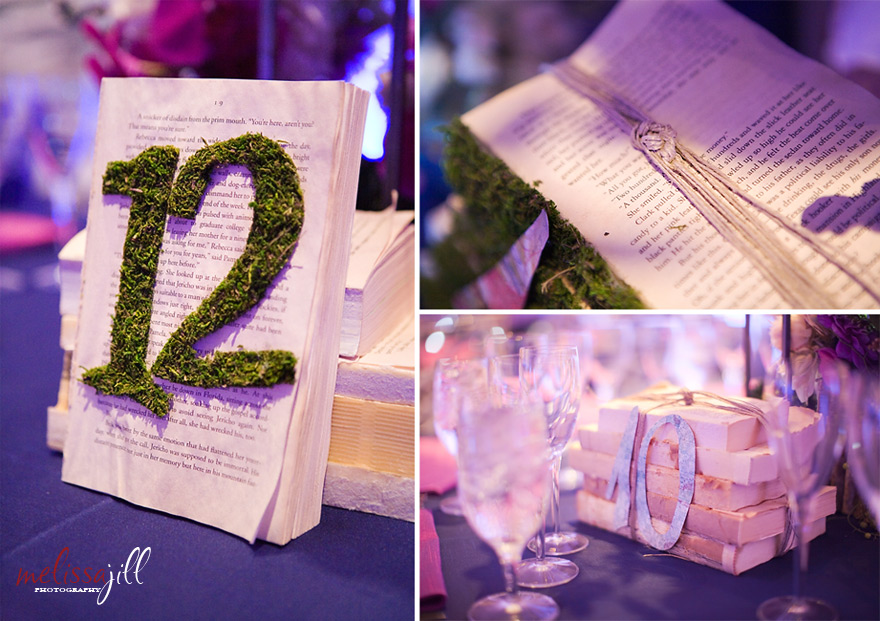
It's always helpful to have a plethora of options, so shooting more angles and variety can only help you come up with the very best final set of images after culling.
I hope you found this series helpful! If you have, I would love if you would share it using the Facebook and Twitter buttons below or pinning it to Pinterest! And click here to find out about other resources I offer photographers!
Credits by image grouping (top to bottom):
1 -- Wedding Coordinator & Event Decor: Victoria Canada Weddings & Events / Venue: Phoenix Art Museum / Florist: Petal Pusher / Linens: Wildflower Linen / Cake: Sedona Cake Couture / Rentals: Classic Party Rentals
2 -- Wedding Planner: Outstanding Occasions / Venue: Private home in Paradise Valley / Florist/Decor: Camelback Flowershop / Rentals: Cre8ive Event Rentals / Linens: Wildflower Linens / Cake: Classic Cakes
3 -- Wedding Planning & Concept: Ashley Gain Weddings and Events / Venue: Wild Horse Pass Resort / Florist/Decor: Flora Bella / Rentals: Cre8ive Event Rentals & Classic Party Rentals / Cake & cupcakes: Let Them Eat Cake / Linens: La Tavola
4 -- Wedding Planner: Outstanding Occasions / Venue: Paradise Valley Country Club / Florist/Decor: Petal Pusher / Rentals & Lighting: Cre8ive Event Rentals / Rentals: Dusty Lilacs / Stationery: Idieh Design / Linens: La Tavola
5 -- Wedding Planner: Amy Mancuso Events / Venue: The Silverleaf Club / Florist: Artistic Surroundings / Stationery: Celebrations in Paper / Cake: Sugar Sugar Cake Studio
6 -- Wedding Coordinator & Event Decor: Victoria Canada Weddings & Events / Venue: Phoenix Art Museum / Florist: Petal Pusher / Calligraphy: Jennifer Schmitt Calligraphy
7 -- Wedding Coordinator & Event Decor: Victoria Canada Weddings & Events / Venue: Phoenix Art Museum / Florist: Petal Pusher / Linens: Wildflower Linen
Comments


