

Today I'm continuing my series for photographers on shooting wedding reception details. If you missed Part 1, click below to get caught up!
Part 1: Pick the right detail
While we touched on it a bit in Part 1, today we're going to talk about light. Often, this commodity is in short order in dark reception venues, but it is vital to photographing details beautifully. So I'm going to share a few solutions that have really worked for me.
First, don't be afraid to ask the wedding planner or catering manager if they can turn up the house lights for just a few minutes. Oftentimes, lights are set very low for ambience, but by just turning them up for a few minutes before the guests arrive in the room, you can get that extra bit of light you need to photograph them well.
If you have a good camera, don't be afraid to bump up the ISO. Less expensive cameras or older models will produce lots of grain at high ISOs, but the newer models perform quite well. I shoot with a Canon 5D Mark III, and I will go up as high as 1600 or 2000 for detail photos. I also use a low aperture -- generally around f2.0 or 2.2 to let as much light in as possible, while still maintaining a sufficient depth of field.
When shooting at higher ISOs, it is vital that you expose correctly in camera. As I mentioned in this post about eliminating grain, most of the graininess in photos results from photographers under-exposing images shot at high ISOs in camera, and then trying to compensate in their post-production by increasing the exposure after the fact. And under-exposing is easy to do when shooting reception details. Window light, candles, and ambient light from chandeliers or wall sconces will cause you to underexpose if you simply zero-out your in-camera meter. You need to over-expose according to your in-camera meter (typically by 1 full stop), if these elements are in your composition, in order to correctly expose for the details in the image.
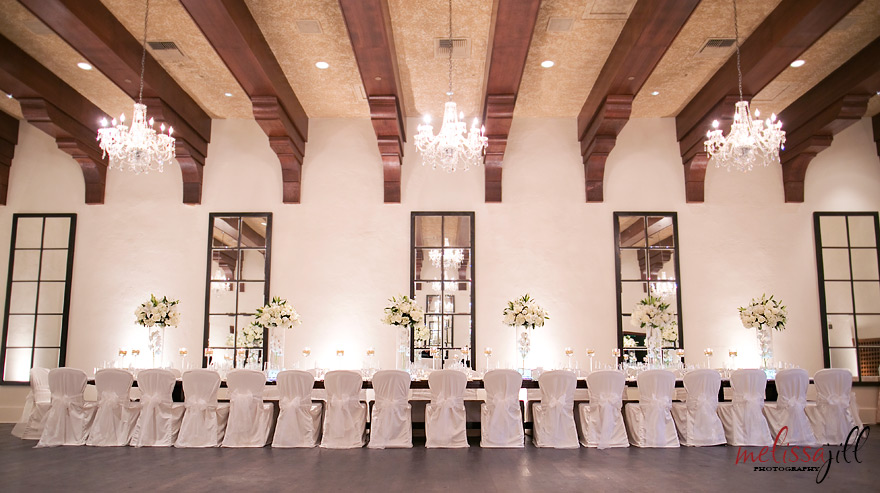
Here's an example. This image has chandeliers, candlelight, uplighting on the walls, and to top it all off, the majority of the subject matter is white. Because my camera is trying to capture detail in all the highlights, and expose for 18% grey, if I trusted it, I would inevitably underexpose this image and have to compensate in post. I had to over-expose by one full stop in order to correctly expose this image.
Part 1: Pick the right detail
While we touched on it a bit in Part 1, today we're going to talk about light. Often, this commodity is in short order in dark reception venues, but it is vital to photographing details beautifully. So I'm going to share a few solutions that have really worked for me.
First, don't be afraid to ask the wedding planner or catering manager if they can turn up the house lights for just a few minutes. Oftentimes, lights are set very low for ambience, but by just turning them up for a few minutes before the guests arrive in the room, you can get that extra bit of light you need to photograph them well.
If you have a good camera, don't be afraid to bump up the ISO. Less expensive cameras or older models will produce lots of grain at high ISOs, but the newer models perform quite well. I shoot with a Canon 5D Mark III, and I will go up as high as 1600 or 2000 for detail photos. I also use a low aperture -- generally around f2.0 or 2.2 to let as much light in as possible, while still maintaining a sufficient depth of field.
When shooting at higher ISOs, it is vital that you expose correctly in camera. As I mentioned in this post about eliminating grain, most of the graininess in photos results from photographers under-exposing images shot at high ISOs in camera, and then trying to compensate in their post-production by increasing the exposure after the fact. And under-exposing is easy to do when shooting reception details. Window light, candles, and ambient light from chandeliers or wall sconces will cause you to underexpose if you simply zero-out your in-camera meter. You need to over-expose according to your in-camera meter (typically by 1 full stop), if these elements are in your composition, in order to correctly expose for the details in the image.
Here's an example. This image has chandeliers, candlelight, uplighting on the walls, and to top it all off, the majority of the subject matter is white. Because my camera is trying to capture detail in all the highlights, and expose for 18% grey, if I trusted it, I would inevitably underexpose this image and have to compensate in post. I had to over-expose by one full stop in order to correctly expose this image.
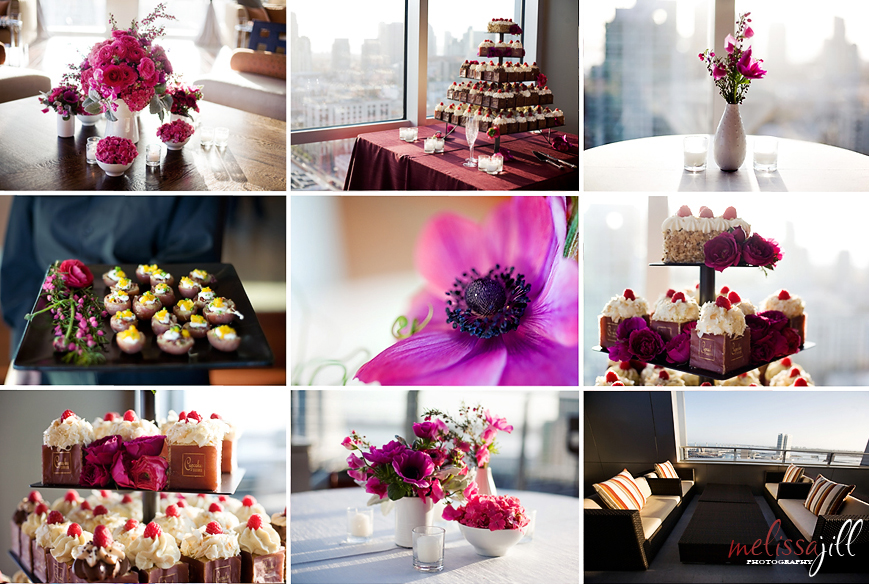
I don't want to be too redundant in this series, but I want to expand on something I touched on in Part 1. When it comes to shooting details, make sure you pick the one out of the bunch that is best lit. When you are dealing with windows, oftentimes, it's best to pick the detail closest to the window, but shoot it from an angle where the window isn't in the background. Typically, if you do shoot with the window in the background, you will just completely blow out whatever is outside in order to correctly expose for the detail. There is one exception to this. If the sun is low in the sky, or just set, sometimes the exposure indoors and outdoors is close enough where you can capture some detail outside the window. See a few of the detail photos in the grouping below as an example. When this is the case, it can be fun to include the window in the composition because it helps show off the reception venue and provide context.
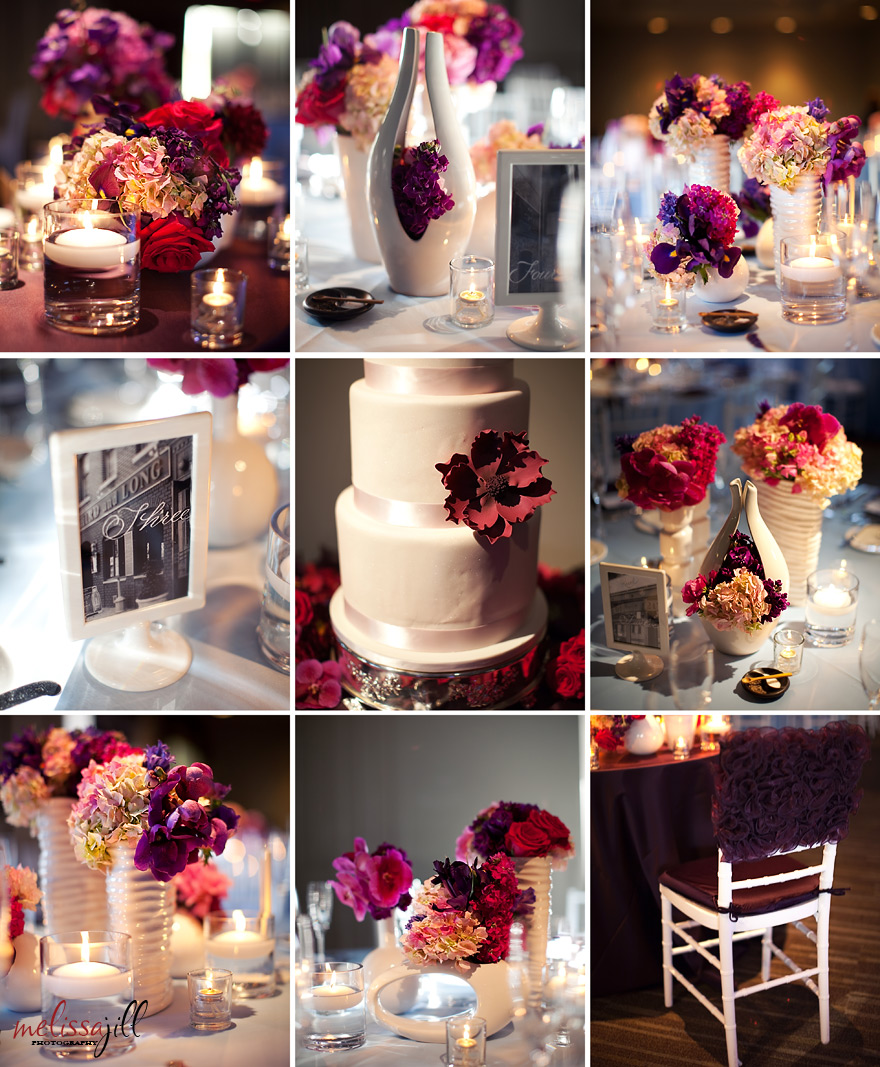
Photographers all love window light, but sometimes there is none to be found and we have to get creative. For the reception at which I shot this next set of images, the venue was made up of walls of window, but they were all covered by black-out shades during the time I had to shoot. The guests were just outside enjoying cocktail hour, and the venue didn't want them seeing in. There was such a variety of centerpieces, and I wanted to make sure to capture each one. So, for the ones that were not well-lit, I had my assistant hold open a door to let some light flood in near each table so I could quickly capture them. Kind of a ghetto solution -- but hey! It worked!
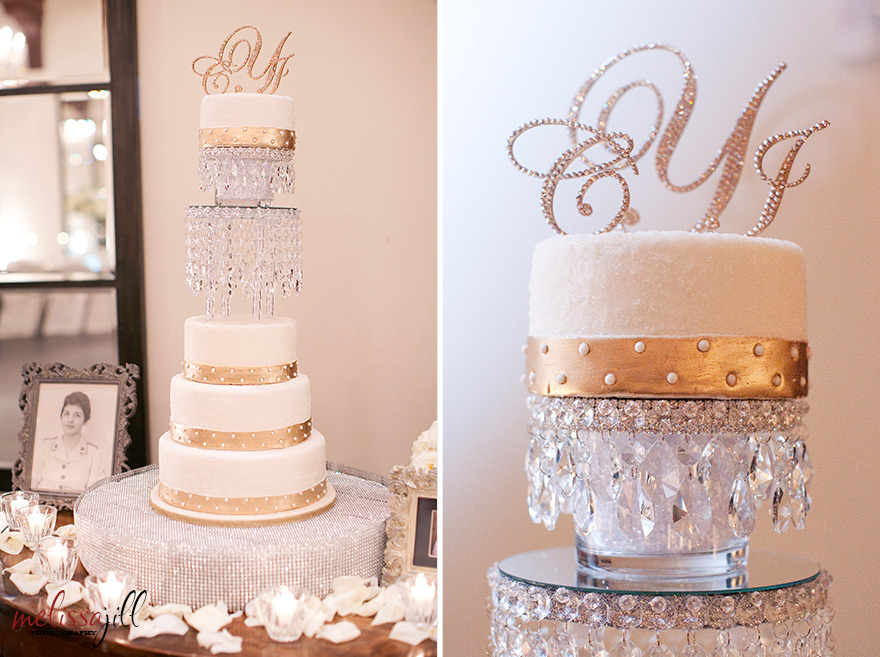
Opening a door is one way to create light. Another option is to use off-camera flash. I typically try to shoot details with available light as much as possible just because I'm usually working under time constraints, but sometimes, if time permits, I use my assistant as a moving light stand to help me photograph poorly-lit details. For the cake below, the image on the left was photographed with available light -- and it's perfectly acceptable. But to get the cake topper on the right, I had my assistant hold my off-camera flash off to my left. I think some of the light reflected back toward the cake from the mirror and it gave a great effect, highlighting the sparkly jewels.
The great thing about using your assistant, is you can ask them to move closer or further away from the detail in order to quickly make adjustments for your exposure. You can also quickly experiment with different flash angles and see their effects.
The great thing about using your assistant, is you can ask them to move closer or further away from the detail in order to quickly make adjustments for your exposure. You can also quickly experiment with different flash angles and see their effects.
Here is one more example of a cake lit by off-camera flash. I wish I had an image to show you what it looked like shot with only ambient light, but hopefully you can imagine, from looking at the dark side of the cake, how bad it was. This is 100 times better.

To find out more about how I use off-camera flash to shoot details, click here.
I hope you found this post helpful! Stay tuned for the next installment of this series on photographing wedding reception details.
In the meantime, click here to find out about other resources I offer photographers!
Credits by image grouping (top to bottom):
1 -- Wedding Planner: Jennifer with Outstanding Occasions / Venue: Royal Palms / Florist & Rentals: White House Flowers / Stationery: Idieh Design / Lighting: Swank Audio
2 -- Venue: Montelucia Resort & Spa / Florist/Decor: Angelic Grove
3 -- Wedding Planner: Creative Affairs by Amanda / Venue: The Ultimate Skybox
4 -- Wedding Planner: Rhonda Rush with Impact Events / Venue: Sanctuary on Camelback / Florist: Avant-Garde / Cake: Julia Baker Confections
5 -- Venue: Montelucia Resort & Spa / Florist/Decor: Angelic Grove / Cake: The Baked Equation
6 -- Venue & Cake: Desert Mountain's Cochise/Geronimo Clubhouse
Click here to read the next part of this series.
Comments


