

Today I'm continuing my series for photographers on shooting wedding reception details. If you haven't done so already, click below to get caught up!
Part 1: Pick the right detail
Part 2: Light
While we touched on it a bit in Part 1, today we're going to talk about positioning. Shooting details offers us photographers a plethora of options as far as where we choose to position ourselves. And this choice can make a huge difference in how good the resulting image is.
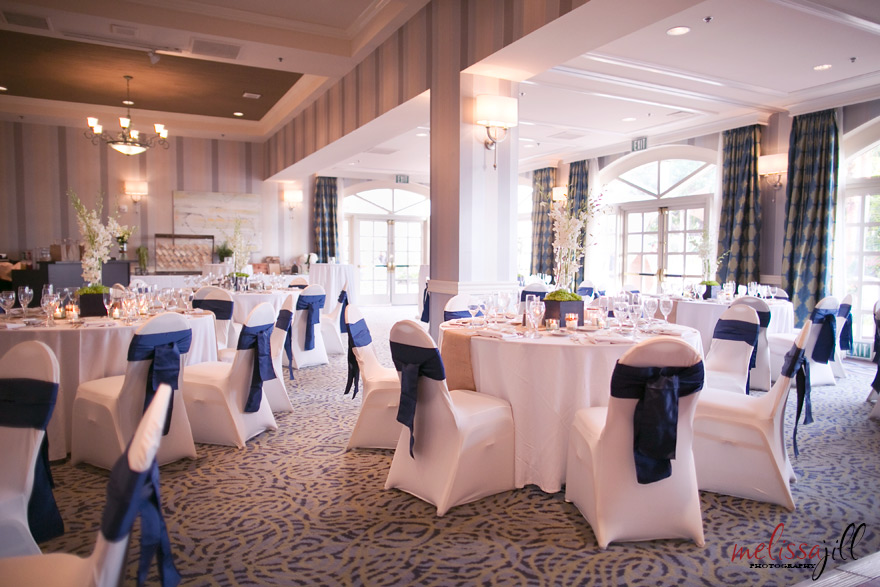
The first thing to consider when positioning yourself in relation to a detail, is the obvious -- how can I make it look its best? In the case of room shots, like the one above -- where can you stand that will show off the best of the room? I took a variety of room shots at this reception, but the photo above ended up being my favorite because it highlights the beautiful ceiling feature and eliminated some of the less attractive parts of the room -- like where the band was set up.
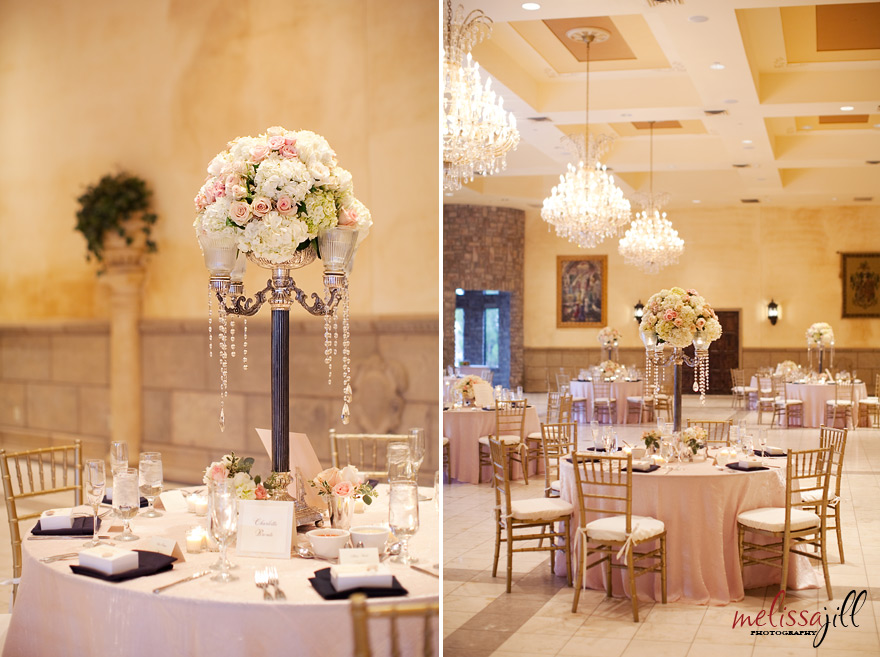
For this next room shot, I chose to stand here, because it allowed me to show off the architectural elements surrounding the doors, and utilize the natural light flooding that end of the room. You can't see it, but the rest of the room was filled with wallpapered walls, doors without windows, and the dance floor. So this was clearly the best choice.
Part 1: Pick the right detail
Part 2: Light
While we touched on it a bit in Part 1, today we're going to talk about positioning. Shooting details offers us photographers a plethora of options as far as where we choose to position ourselves. And this choice can make a huge difference in how good the resulting image is.
The first thing to consider when positioning yourself in relation to a detail, is the obvious -- how can I make it look its best? In the case of room shots, like the one above -- where can you stand that will show off the best of the room? I took a variety of room shots at this reception, but the photo above ended up being my favorite because it highlights the beautiful ceiling feature and eliminated some of the less attractive parts of the room -- like where the band was set up.
For this next room shot, I chose to stand here, because it allowed me to show off the architectural elements surrounding the doors, and utilize the natural light flooding that end of the room. You can't see it, but the rest of the room was filled with wallpapered walls, doors without windows, and the dance floor. So this was clearly the best choice.
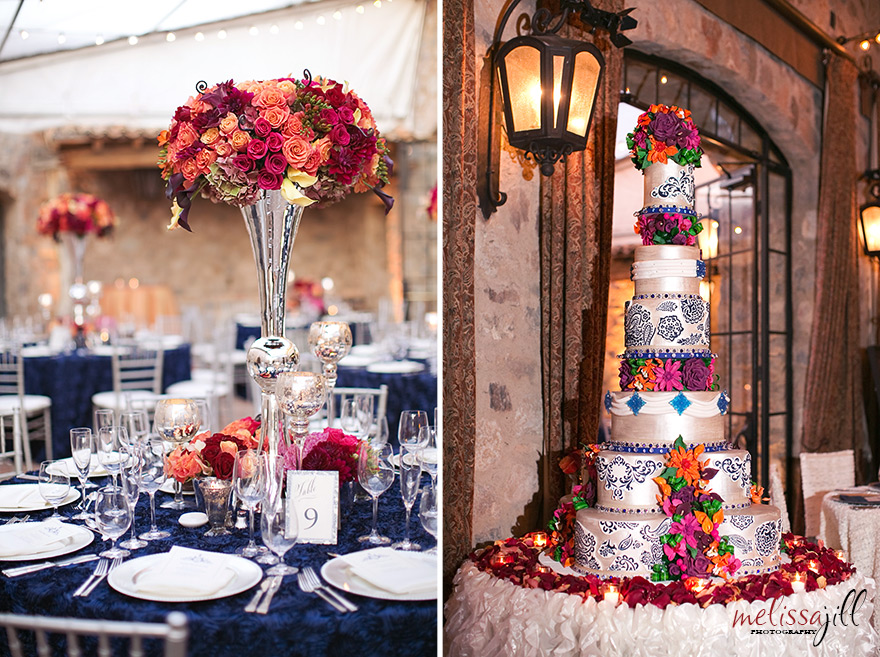
The above examples are both room shots, but this same concept applies to other reception details. Centerpieces often look best from a certain side, and when photographing cakes, it is important to make sure that if there is a front of the cake, you are shooting that side of it. I've talked to my cake vendor friends, and there's nothing that irritates them more than receiving images from a photographer where the cake wasn't photographed from the correct angle, capturing their vision and design.
The next thing to consider when choosing a position from which to photograph a detail, is the background. It's best to move around a detail, paying attention to what is in the background; trying to eliminate any distracting elements. I love the centerpiece shot below on the left, because it just stands out so cleanly from the simple background:
The next thing to consider when choosing a position from which to photograph a detail, is the background. It's best to move around a detail, paying attention to what is in the background; trying to eliminate any distracting elements. I love the centerpiece shot below on the left, because it just stands out so cleanly from the simple background:
Same with this cake. The background provided really great contrast that helps show off the ruffled edges of the cake. A lighter background, which I also had as an option, would not have shown it off as well.

This next cake really only had one good positioning option, due to the giant wall sconce behind it. If I would have photographed it from the front, the sconce would have been coming out of the top of the cake. No Bueno.
The last thing to be mindful of as it relates to positioning, is the position of your body while you are shooting. We are so used to seeing the world from our eye-level, that sometimes we get lazy with our shooting and only shoot standing up, with our camera pointed at whatever angle is necessary for us to get the detail in the frame. But that's not always the most flattering angle at which to photograph a particular detail. And each detail is a little different. I've found that while some details are best photographed from slightly above (i.e. the place setting and dance floor below), most details look better if you squat down to their level. The centerpiece and the table linen images below are good examples of this:
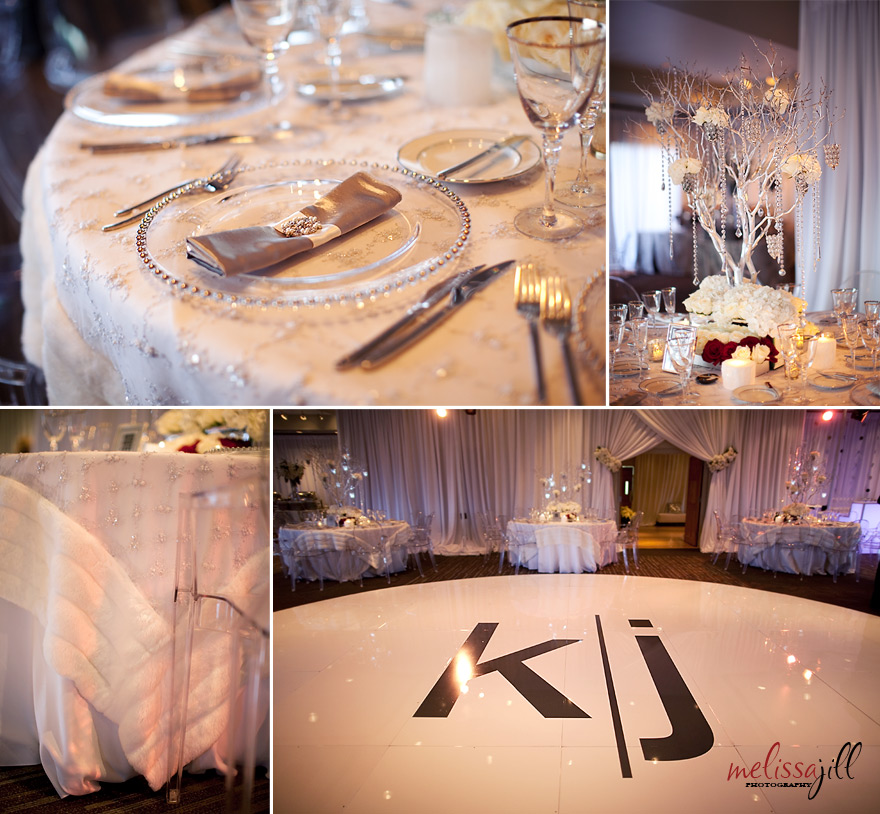
Squatting down so that you are eye-level with a detail can be great as well, because it allows you to introduce foreground elements into your composition, giving it depth. Two examples in the next set of images are the top table shot where I have a chair in the foreground, and the bottom image of the giant succulent, where I chose to shoot through a wine glass.

Introducing foreground elements into your detail shots will add interest and give them more three-dimensionality.
I hope you found this post helpful! Stay tuned for the next installment of this series on photographing wedding reception details.
In the meantime, click here to find out about other resources I offer photographers! And click here to find out about my blog collage templates. I used them to combine details in this post into pretty combos and they are available for purchase if you want to make your blogging easier and faster!
Credits by image grouping (top to bottom):
1 -- Wedding Planner: Emily Edwards with Your Heart's Desire Weddings and Events / Venue: The Ritz Carlton Phoenix / Florist: Petal Pusher
2 -- Venue: Hilton Mission Bay San Diego / Florist: Exquisite Blooms
3 -- Wedding Planner: Jennifer Thye with Imoni Events / Venue: The Castle at Ashley Manor / Florist: Blume / Linens: Wildflower Linens
4 -- Wedding Planner: Outstanding Occasions / Venue: Private home in Paradise Valley / Florist/Decor: Camelback Flowershop / Rentals: Cre8ive Event Rentals / Linens: Wildflower Linens / Cake: Classic Cakes
5 -- Wedding Planner: Amy Mancuso Events / Venue: The Silverleaf Club / Florist: Artistic Surroundings / Stationery: Celebrations in Paper / Cake: Sugar Sugar Cake Studio
6 -- Planner, Florist & Decor: White House Flowers / Venue: Sanctuary on Camelback
7 -- Wedding Planner: Victoria Canada Weddings and Events / Venue: The Boulders Resort / Florist/Decor: Petal Pusher / Stationery: Celebrations in Paper / Rentals: Classic Party Rentals / Linens: Wildflower Linens
Click here to read the next part of the series.
Comments


