
Today I'm continuing my series for photographers on tips for finding great shooting locations. Last week I talked about choosing locations based on who your client is -- making each shoot personal and unique. Click here to read part 1 and get caught up!
Whether you're shooting portraits on a wedding day, engagement photos, or family portraits, you as a photographer are the one your clients trust to guide the shoot and place them in great locations. Oftentimes clients think we're just looking for great backgrounds to use for the photos. We've all grown up taking our family portraits in front of the fireplace, taking vacation photos posing next to statues and taking outdoor portraits in front of fountains, right? Because everyone knows that the best spots for photos are by fireplaces, statues and fountains :). We laugh about this as professional photographers, but we have our very own equivalents to fireplaces, statues and fountains. They are: brightly colored walls, fields and alleys. We're on the look-out during shoots for anything we think will serve as a great background for our portraits.
Backgrounds are important to pay attention to, but my second tip for finding great locations is that light trumps backgrounds. If you find a great background for a portrait but the sun is directly in your clients' eyes, or they have dappled sun and shade spots on them, or they are in the shade with a bright background -- it doesn't matter how fabulous the background is, your photo is not going to be stellar. But if you have a simple or nondescript background with fabulous lighting, you will likely end up with a high-impact image. Light trumps background. Stop looking for great backgrounds and start looking for amazing light.
All of the following images were taken in the locations they were, because I was looking for the light. The backgrounds played little to no part in the location decision. I made sure the backgrounds weren't distracting, but beyond that, there was nothing appealing about what ended up behind my subjects in the viewfinder.
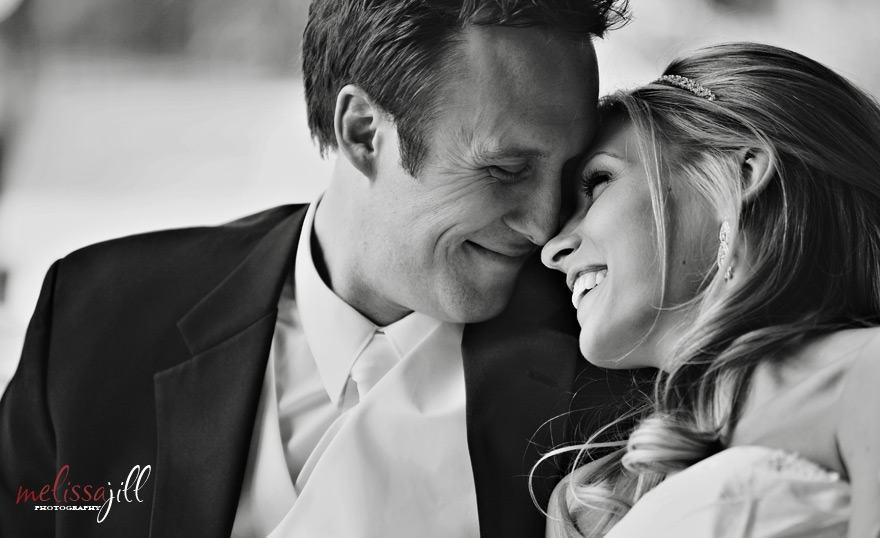
My favorite light in which to photograph people generally falls into two categories: full shade or backlighting. Backlighting has to be my favorite. Click here to read an entire post about it. This first image is an example of how perfect backlighting can separate your subject from it's background in a gorgeous way. Don't they just look like they're glowing? Notice that there is nothing special about the background. The whole reason I picked this spot was the light.
Whether you're shooting portraits on a wedding day, engagement photos, or family portraits, you as a photographer are the one your clients trust to guide the shoot and place them in great locations. Oftentimes clients think we're just looking for great backgrounds to use for the photos. We've all grown up taking our family portraits in front of the fireplace, taking vacation photos posing next to statues and taking outdoor portraits in front of fountains, right? Because everyone knows that the best spots for photos are by fireplaces, statues and fountains :). We laugh about this as professional photographers, but we have our very own equivalents to fireplaces, statues and fountains. They are: brightly colored walls, fields and alleys. We're on the look-out during shoots for anything we think will serve as a great background for our portraits.
Backgrounds are important to pay attention to, but my second tip for finding great locations is that light trumps backgrounds. If you find a great background for a portrait but the sun is directly in your clients' eyes, or they have dappled sun and shade spots on them, or they are in the shade with a bright background -- it doesn't matter how fabulous the background is, your photo is not going to be stellar. But if you have a simple or nondescript background with fabulous lighting, you will likely end up with a high-impact image. Light trumps background. Stop looking for great backgrounds and start looking for amazing light.
All of the following images were taken in the locations they were, because I was looking for the light. The backgrounds played little to no part in the location decision. I made sure the backgrounds weren't distracting, but beyond that, there was nothing appealing about what ended up behind my subjects in the viewfinder.
My favorite light in which to photograph people generally falls into two categories: full shade or backlighting. Backlighting has to be my favorite. Click here to read an entire post about it. This first image is an example of how perfect backlighting can separate your subject from it's background in a gorgeous way. Don't they just look like they're glowing? Notice that there is nothing special about the background. The whole reason I picked this spot was the light.

This next image was shot in full shade under an overhang near some open sun. So you can see there is nice directional light on the subjects. I shot this particular portrait before a ceremony at a location that presented few options during a day when the sun was directly overhead. If you find yourself in this situation, rather than battling with harsh sun to capture portraits with interesting backgrounds, opt instead for full shade in a spot with a nondescript background. You'll love your images so much more.
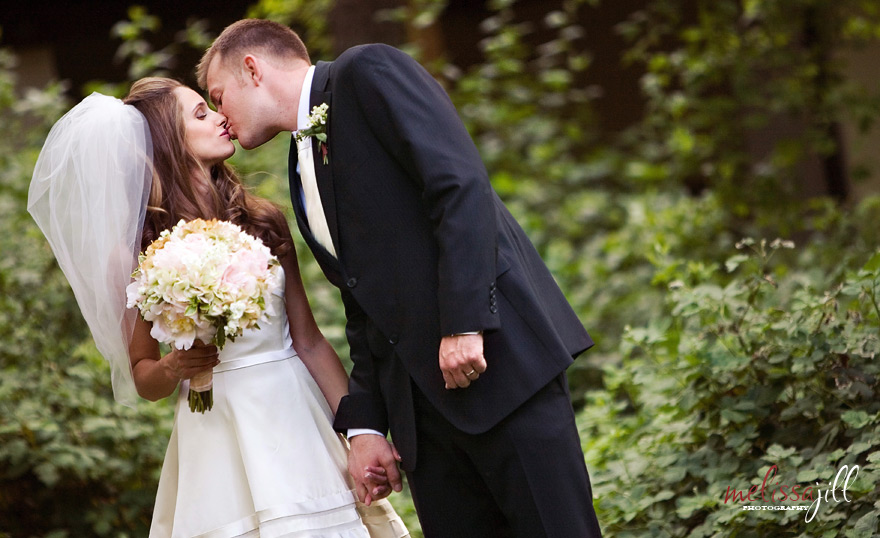
This next image was shot on an overcast day. Generally you can shoot anywhere on an overcast day and have nice soft, light. But note that I still opted for a simple background. Simple backgrounds allow your subjects to shine.
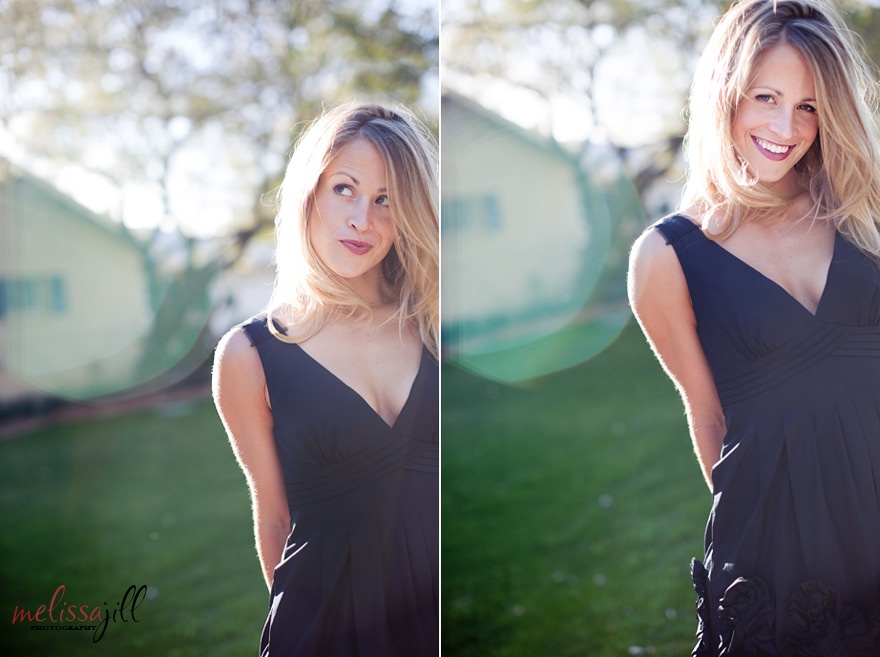
These next two images were taken on a residential street corner and are more examples of gorgeous backlighting:
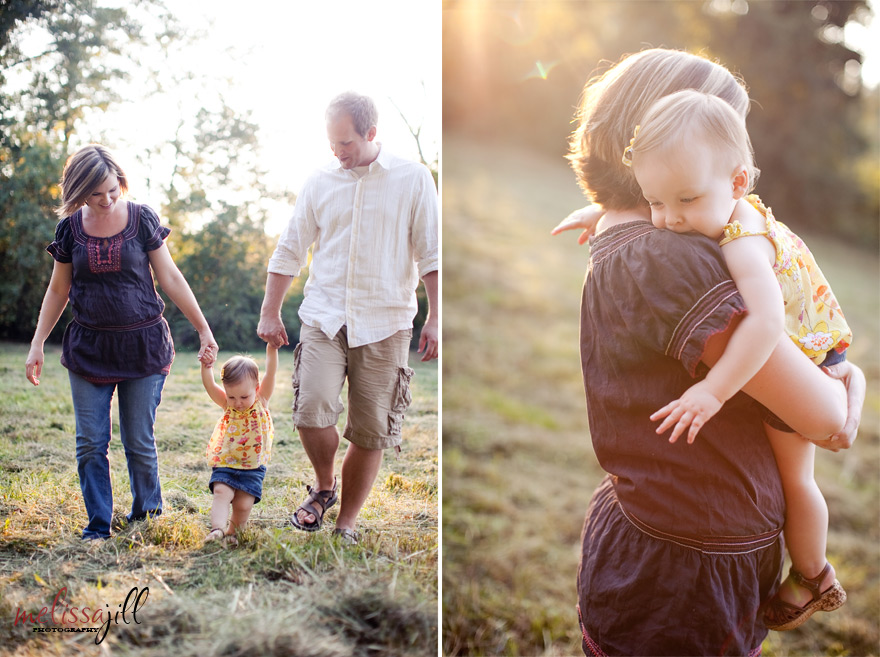
I placed this family in this light without a single thought for the background. And I knew they would be gorgeous:
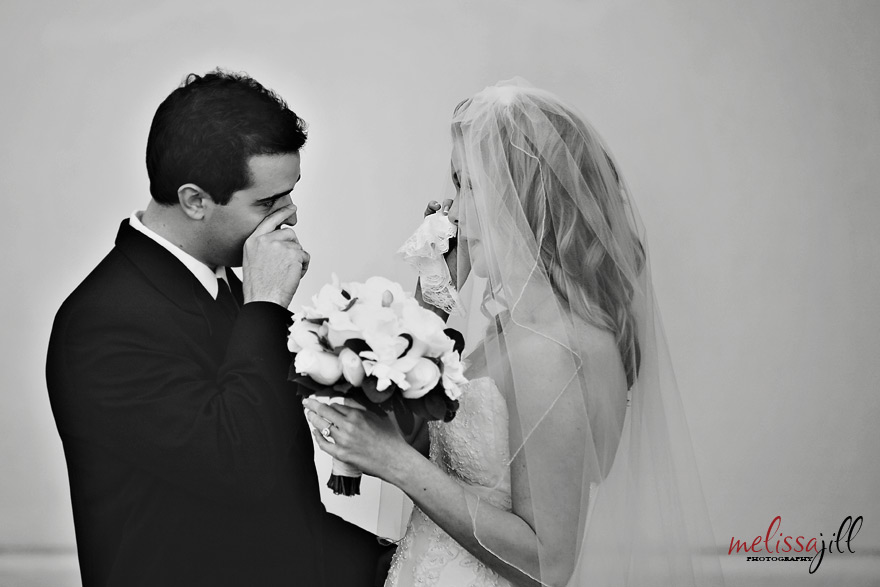
Oftentimes, if a couple chooses to see each other before the ceremony, this means you are doing their first look midday. When the sun is directly overhead and harsh, I opt for a simple background with good lighting for the first look, because it's all about capturing the emotion. This next image was taken at a beautiful resort, but I opted to do the first look in the shade on the side of a building. The image doesn't have an interesting background, but I still think it's better than if I would have chosen a beautiful location with harsh lighting.
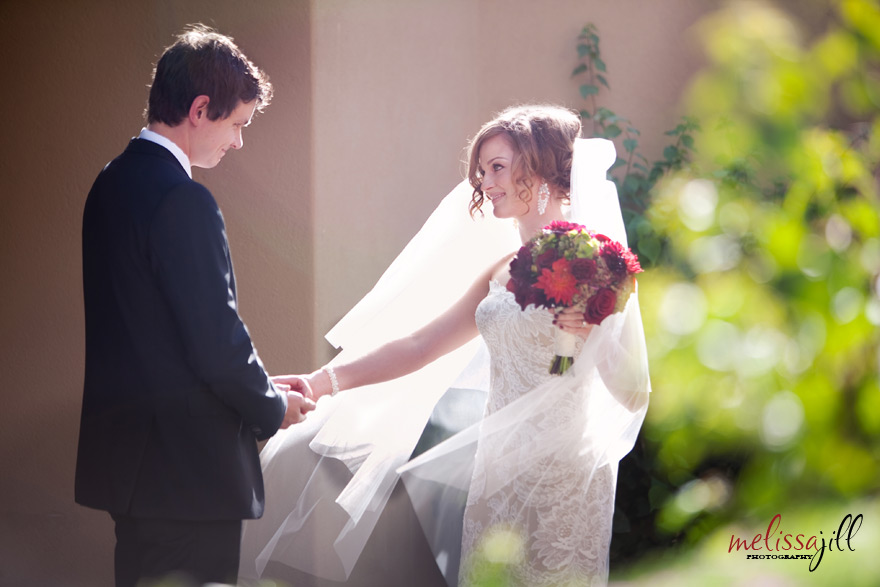
This next first look also happened midday -- and at a venue that has gotten awards for it's gorgeous ceremony view. Instead of opting to stage the first look in front of the view in the harsh sunlight, I chose this walkway out of the way, in front of a blank wall so I could put the subjects in their best light. And I love the intimate result it created:
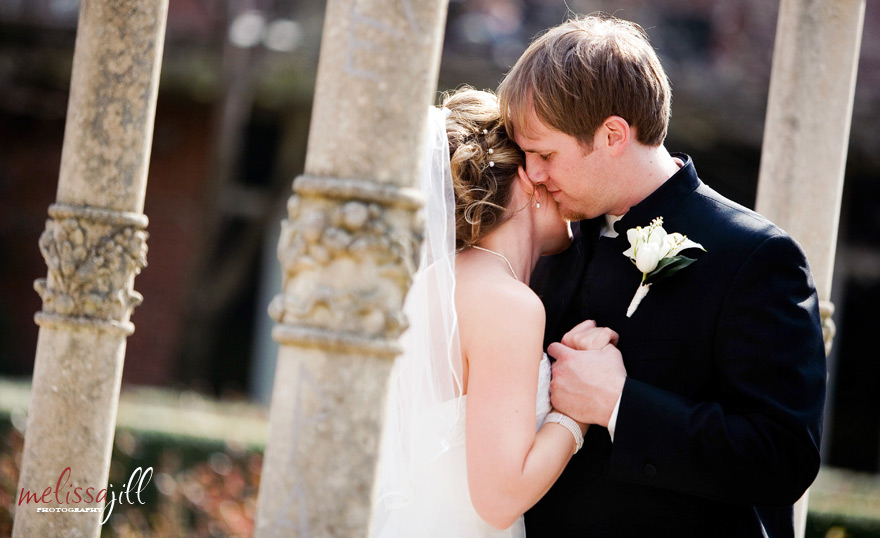
This image was taken under a gazebo -- what would widely be considered a prime photo opp location. But instead of shooting with the gazebo in mind, I positioned myself and the couple with the light in mind.
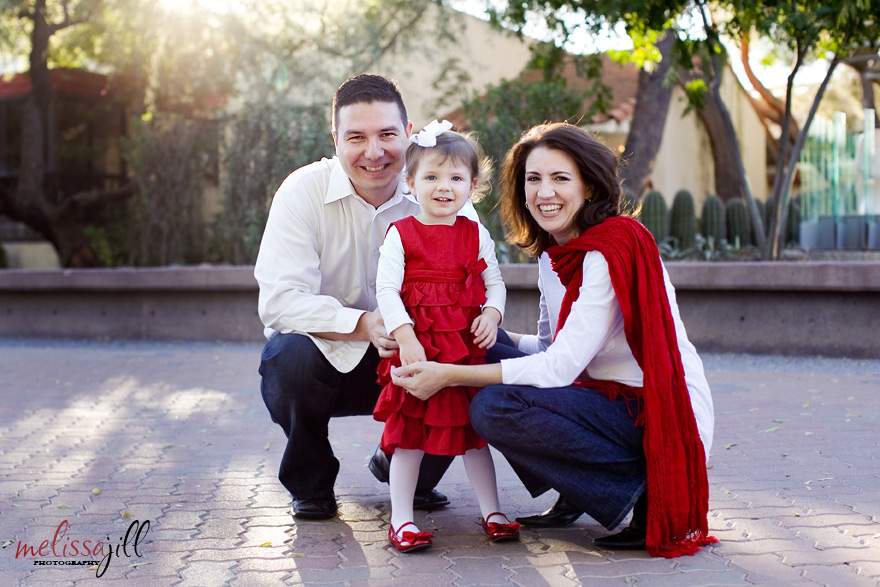
For this next family portrait, there is no reason a photographer would pick this location in particular for a photo. Maybe they would use the little bench/half-wall in the background to pose the family on (which may have produced a decent result since it is in full shade). But I chose to put the family in this spot because of the gorgeous backlight I found.
This next image was taken in the middle of a sidewalk in a downtown urban area. Nothing about this spot, other than the light, made me stop to shoot.

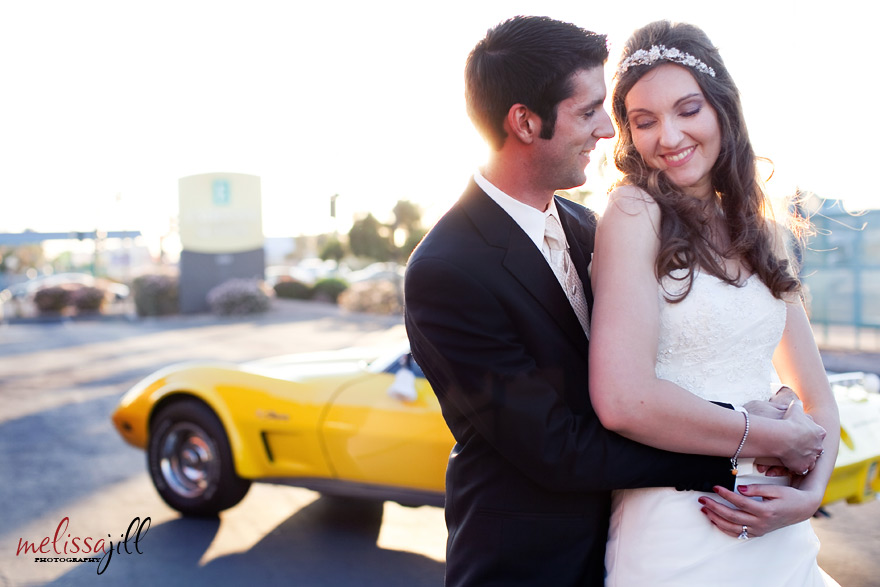
This final example was taken during a wedding at a particularly challenging location. The hotel had an inner courtyard that was very dark and didn't provide a lot of interest. Other than that, the entire hotel was surrounded by a parking lot. We wanted to include the groom's yellow corvette in the photos, so we drove around to the side of the parking lot that offered the best light and shot there. You can't tell because of the low depth of field, but the background is a busy intersection and an Embassy Suites sign. It's all about the light.
If you've been selecting your locations based on backgrounds, I would suggest you change your approach and look for the light. Because light trumps background.
Stay tuned! Next week I will continue this series on finding locations by sharing how I use inspiration to guide my location choices. If you found this tip helpful, click here to find out about other resources I offer photographers!
*Edited to add: Click here to go to part 3 of the series.
--------------------------
Equipment used for above photos:
Canon 5D Mark II
Canon 50mm 1.2 lens
Canon 70-200 2.8 lens
Comments


